In my first post, I showed you how to wrap a ridiculously long skein of yarn, and dye it in plastic food storage bags in the microwave. In this post, I will show you an alternate to the gigantic skein of yarn, as well as show you one alternate way to dye the yarn, and talk about a second alternate way that I have used but not photographed yet.
How to get self striping without a 60+ foot skein of yarn
All of the credit for this one goes to shilo on Ravelry. When she showed me this, I was intrigued, and now I am obsessed! For the record, I know there are other ways (warping boards, for example) but since I have not worked with them yet, I don't really want to comment on them. I might touch on them later on, but for now, we are going to focus on this absolutely brilliant idea.
Ready? It's crazy but it works.... Knit your skein of yarn into an i-cord first! Based on my calculations, one foot of i-cord was equal to about 17 feet of yarn! This measurement will probably vary based on the yarn you use, so you may want to test it out yourself before you do your math to determine the size of your stripes. But regardless of the exact calculations, it means you can get nice super wide stripes by dying smaller sections of the i-cord.
 |
| 100g of Bare Opal Sock Yarn, in an i-cord, with ties every 2 feet |
Now, before you say "Are you nuts, lady? I am not knitting a giant i-cord just to pull it apart later!!!", there is a handy dandy little helper that you can get for this. If you go online, or to one one your local craft stores, you can find an Embellish Knit Machine.
 |
| Embellish Knit machine - be sure to read the instructions! |
This thing is awesome. Using a little crank on the side, you can crank out an i-cord in much less time than it would take to knit or crochet one. And if you really want to do it really fast, with the addition of a cordless drill, you can zoom through it....just check out this video to see how!
So I learned a very important lesson when I was first using my little i-cord maker. As you knit a few feet/yards of the i-cord, wrap it in a ball, secure with a nice wide elastic (or scrunchie) and then move on to the next few feet/yards. Don't let the stuff hit the floor, and make sure you keep wrapping as you go. If you don't, you are going to wind up with a gigantic twisted i-cord that takes longer to untwist than it did to make.
For my first attempt at i-cord dyeing, I put ties every two feet, which would give me stripes that were about 34 feet long. One of the benefits of tying off sections of the i-cord is that you can weave the yarn through the stitches, so your ties don't slip! The stripes were nice and wide, and I loved them! Because the yarn was knit before it was dyed, I got a sort of a heathered look where the stitches acted as resists, which I thought gave the yarn some great character. Here is a look at the final yarn, and at the socks it made.
 |
| i-corda been a contender |
 |
| My nice, wide stripes! |
The added bonus of dyeing in an i-cord? As long as you have marked which end was the end of the icord, you can wind it (or even knit it) right from the i-cord. It unravels quite nicely. You may get the odd section where some of the fibre has shed a bit and wrapped around itself, and may have to carefully be pulled apart. Just be patient and try to avoid scissors.
Alternate Dyeing Technique - Mason Jars
I promised you alternate ideas to dyeing the yarn in the plastic food storage bags, and it just so happens I used one of those ideas in the i-cord yarn shown above. I have this amazing pot from Rachael Ray that is meant for pasta, but also just happens to hold 6 mason jars quite nicely. In case you missed it in the post about my dyeing equipment, here is a shot of it
 |
| Rachael Ray Oval Pasta Pot |
First, soak your i-cord. When I first did this, I added the citric acid to the water, but I have since changed that method, and I now add the citric acid to the jars later in the process. Mostly because I know that some of my dyes have the dreaded Red #3 in them, and also because I was told that adding the acid later will help get a more even colour on the yarn. The dye wont strike so fast.
 |
| Crappy shot of my i-cord soaking, but you get the idea |
The plus side of this is that you are not trying to pour the dye stock in over top of the yarn, you are adding the wet yarn to the dye stock, and it seems like the yarn takes up the dye a little better that way. The down side is that I find the colour can wick faster between the sections, but more on that in a moment. Whichever way you do it, add about 1/8th of a tsp of non-iodized salt to the dye stock, making sure it is dissolved. The salt should slow down the absorption of the dye and give a more even colour. You can dissolve it in just a little bit of hot water before you add it.
Starting with one end of your i-cord, add the yarn to the first jar until you see the tie. Leave a little bit of the yarn, and the tie, hanging over the side of the jar, and start putting the next section in the next jar. Repeat the process until all of your yarn is in the jars.
Next you want to take the sections hanging between the jars and dip them into the colours on each side. I tend to do the lightest colour first, then the darkest. Try to leave a little space between the jars and let the sections with the tied hang down between them. You will get some higher shades in between the stripes, but I have found when I knit with them, they worked to my advantage because the stripes sort of faded into each other, rather than having an abrupt transition.
As you can see in the picture below, I kept them up at the top of the jars, and you can also see where the colour really wicked into the other jar. Particularly the orange wicking into the yellow. It was supposed to be a bright sunny yellow, but came out a bit darker than I intended. If I had left a bit more room and let the yarn dangle, the excess dye would have dropped into the water on the outside of the jars instead.
 |
| My i-cord split into 6 different colours. Pay attention to what colours you put beside each other, because they will wick into each other, and you wan the combination to be pleasant |
If you put the yarn in the jars first, and then add the dye stock, there seems to be less time for the colour to wick, but you run the risk of the dye striking first at the top of the yarn, and that yarn further down in the jar not getting as much colour. This really is one of those places where you will need to experiment for yourself and see what you get.
Once you have brought your dye stock up to temperature (170F -180F ) , you can add your acid. I use the citric acid and water solution (1 tablespoon of citric acid to one cup of water), and add 1/2 a tablespoon to each colour. Hold them at the target temperature for 5 minutes and repeat. I like to add it slowly like this to all colours in the event that any of them have Red #3 in it that I am not aware of. Too much acid to Red #3 and you can get colour that won't bond.
I try to let these simmer at the target temperature until the dye baths have run clear. I do find that for any that contain blue, I may need to add more acid, up to a tablespoon more, to help the process. And I frequently get to a point where I feel like the dye bath is "clear enough".
Turn off the heat and let them cool. This is one of those cases where I do try to have the patience to let them cool as much as possible. It helps set any dye that may still be in the water, and this stuff is really freaking hot, so it needs time to cool. Gently wash and rinse as you do with any other yarn, and you will wind up with what looks like a very pretty pile of multicoloured spaghetti.
A note when rinsing your yarn
I mentioned this in the first self striping yarn post, but it bears repeating. When you are washing/rinsing your colours, start with the lightest colour first, and work your way through the colours. I like to put the cooled pot beside the sink and start with the yellow, pulling it right out of the jar. As the colour is washed, I pull it back out and put it on a plate, careful to keep the colours separate. This will ensure that if there is any residual dye left over, it wont transfer onto the other colour.
Dry your yarn in whatever way you usually dry it. For me, that is the shoe rack in the dryer, but for you it could be hanging it up to dry. Which could be fun with this giant cord...
 |
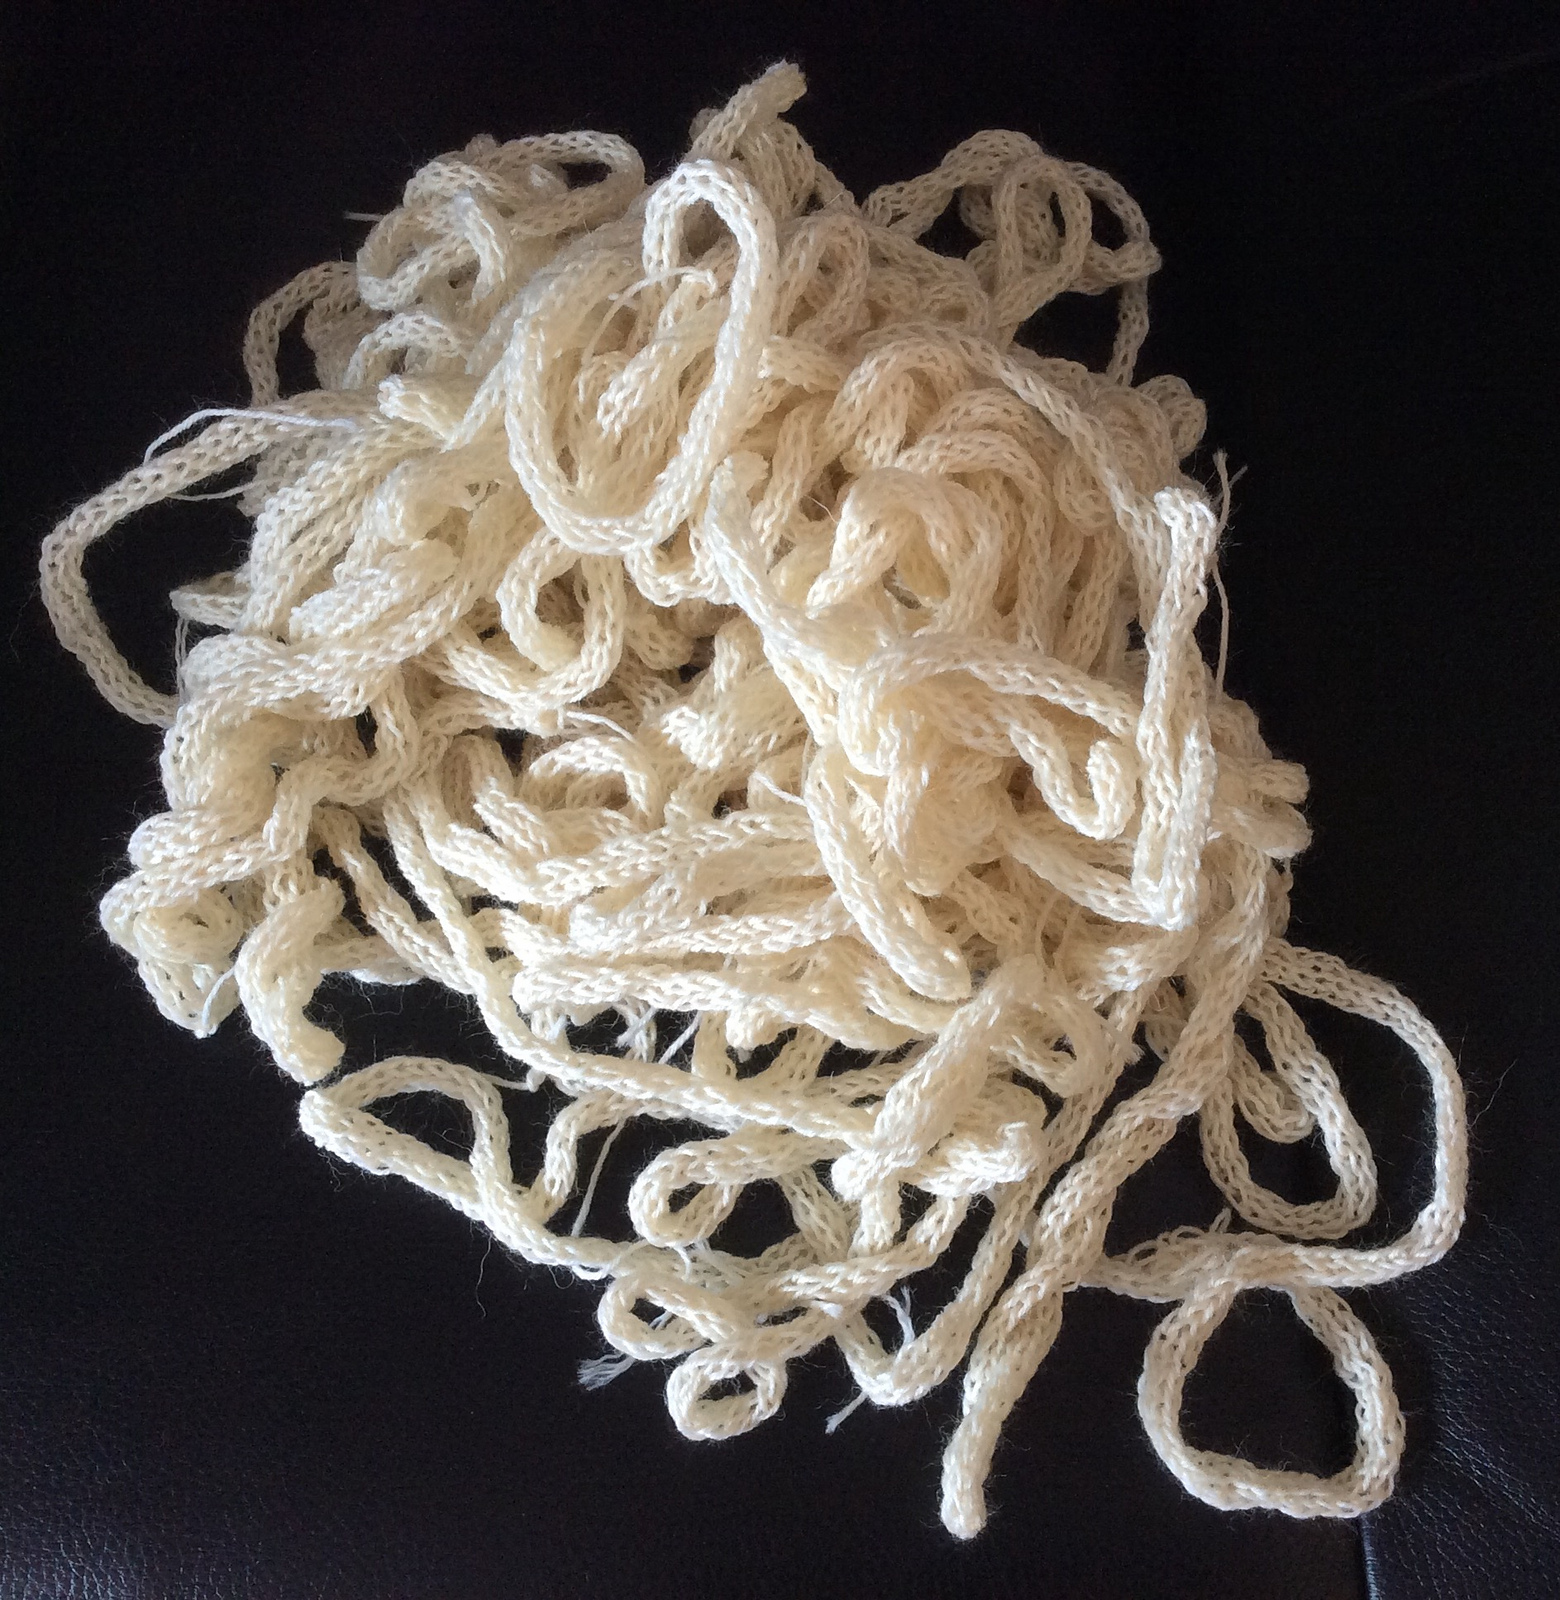
| The i-cord after being washed and dried |
I have done this with some skeins that I have made where I needed both speckled yarn and solid stripes. I prepared my dye stock, making sure the solid colours were in large amounts of water and in larger dishes, then dipped the larger sections directly into the dye stock, wringing them out, before placing the smaller sections on my cooling rack and hand painting them. (This is a time when gloves come in handy....otherwise you are going to dye your hands...trust me, I know).
In the examples below, I have thickened some of the dye using guar gum so I could get more solid breaks between the colours. I will try to make the post on guar gum be my next post. But this will work without thickening the dyestock if you are making solid stripes. The only reason I did it with guar gum for these was because of the speckled sections. They have a lot of white, and I didn't want the other colours bleeding into that white.
Here are two examples where I have used this technique:
 |
| The yellow, blue and purple had the edges hand painted with thickened dye, and then were dipped, while the speckled section was hand painted |
 |
| The blue and purple were thickened and hand hand painted before the pink and green sections were dip dyed. The speckled sections were hand painted. |
There you have it!
One alternate way to wrap your skein, and two alternate ways to apply the dye. I hope this post and the Part One post inspire you to make some self striping yarn. Chances are you will groan about or outright curse the process while you are doing it, and may even vow to never do it again, but the first time you knit something up with the self striping yarn, you will be in love, and will be planning out your next skein.
No comments:
Post a Comment